
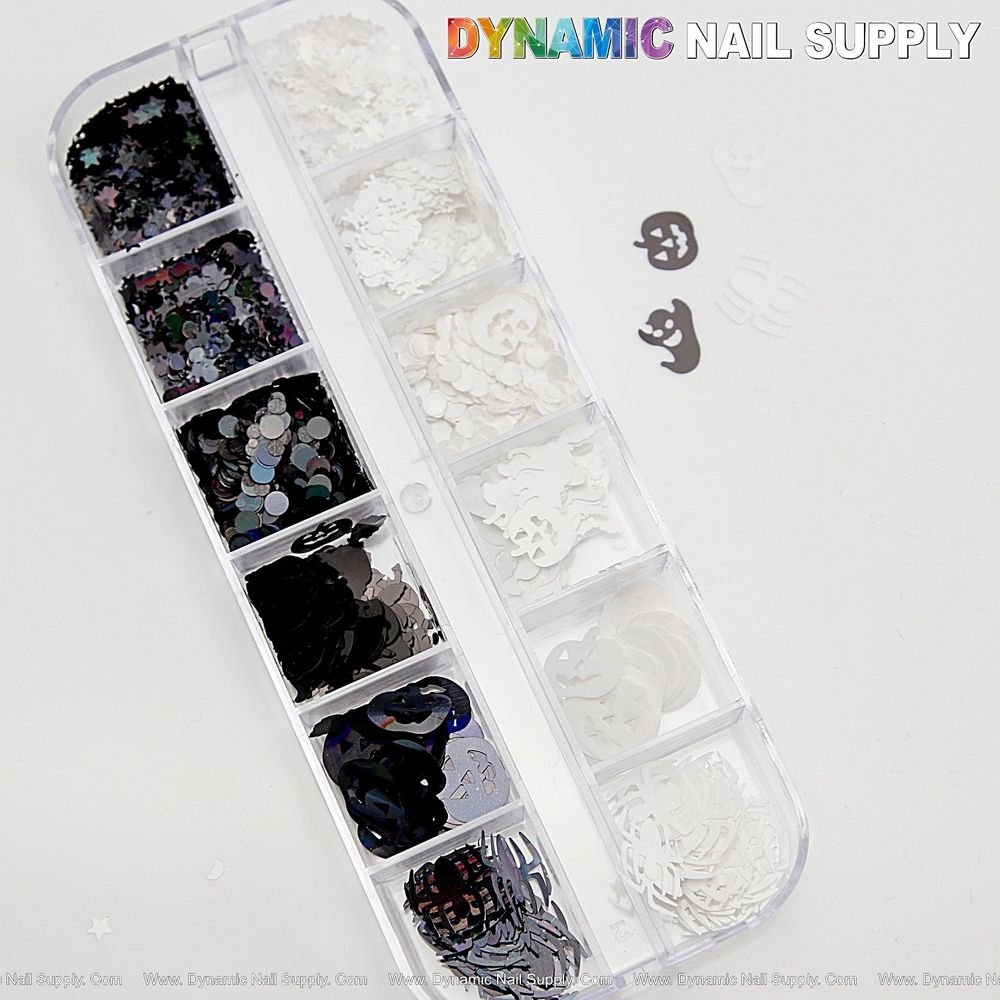
Small, shiny accents can transform a plain manicure into a themed statement. Halloween nail art sequins — like mixed black-and-white pumpkin and spider shapes — are an easy, low-commitment way to add spooky detail to your tips. This guide explains what those tiny pieces are, the tools you need, and a clear step-by-step application for beginners.
If you’re ready to try them, grab this spooky sequin mix; sold by Dynamic Nail Supply and priced at $5.99 (prices may change).
What are Halloween nail art sequins? Simple terms
Sequins and flakes used in nail art are tiny decorative pieces cut into shapes — in this case pumpkins, spiders and complementary dots or flakes in black and white. They are sometimes called nail charms or flakes and are designed to sit on top of polish or be embedded in gel or acrylic. For beginners, think of them as miniature stickers for nails that need a little adhesive or top coat to stay put.
Basic tools and supplies you’ll want
- Base polish or builder gel — a smooth surface helps sequins lay flat.
- Thin tweezers or a wax dotting tool — for precise placement of small shapes.
- Clear top coat or gel top coat — to seal the design.
- Small dish or tray — to hold the sequins and prevent spills.
- Optional: a tiny amount of nail glue or gel adhesive for longer wear.
Step-by-step application for beginners
1. Prep the nail
Start with clean, dry nails. Remove oils with an alcohol wipe if you like a longer-lasting result. Apply a base coat and let it dry, or cure your base layer if using gel. This gives the sequins a smooth surface to adhere to.
2. Plan your layout
Before touching any adhesive, hold the sequins over the nail to decide placement. For Halloween designs, a single pumpkin near the cuticle, a tiny spider crawling toward the tip, or scattered flakes over an accent nail work well. Planning prevents repositioning and smudging.
3. Pick up and place the sequins
Use tweezers or a wax dotting tool to pick up a sequin. If the sequin is lightweight, you can pick it up with a slightly tacky brush tip. Gently set the sequin on the tacky or slightly wet polish so it adheres. For gel systems, place the sequin into the uncured layer and then cure according to your gel instructions.
4. Seal with top coat
When all sequins are in place, apply a generous layer of clear top coat to fully encapsulate the shapes and smooth any edges. For best wear, apply two thin coats of top coat, allowing regular top coat to dry completely or curing each layer if using gel.
Styling ideas and placement tips
- Accent nail: Use a cluster of pumpkins and spiders on a single nail for a subtle theme.
- Negative space: Place a single spider near the cuticle on a nude base for a minimalist look.
- Monochrome drama: Let the black-and-white palette carry the design with matte top coat for a gothic finish.
- Layering: Combine sequins with tiny metal studs or chrome flakes for texture, keeping heavier pieces near the cuticle so tips stay smooth.
Who should use these sequins?
These mixed black-and-white pumpkin and spider sequins are ideal for nail artists and hobbyists who want seasonal flair without permanent change. Beginners will appreciate the straightforward placement process; salon techs can use them to create quick add-ons for themed sets. They work well for party nails, photos, or short-term wear around Halloween.
Care, storage and safety notes
- Small parts: These sequins are tiny. Keep out of reach of young children and pets to avoid choking hazards.
- Storage: Keep sequins in a sealed container or zip bag to prevent loss and contamination.
- Removal: Soak-off techniques work for many layered manicures. If pieces resist, gently lift with a wooden stick after softening adhesive with remover.
- Tool hygiene: Clean tweezers and dotting tools between clients or uses to maintain sanitation.
Final tips for success
- Work one nail at a time if you’re using air-dry polish — it keeps the base tacky when you need it.
- Less is more: a few well-placed sequins can look more professional than crowded designs.
- Practice on a nail tip or spare nail first to get comfortable with placement and sealing.
With a little patience and the right tools, Halloween nail art sequins let you create festive looks quickly. Whether you prefer a single spooky accent or a full themed set, these tiny pumpkins and spiders make seasonal nail art approachable for beginners and pros alike.
